Summary
This is a lengthy post which covers numerous topics on using fonts with TeX and DVIPS. It was fun to write and program but it certainly absorbed many hours of my evenings and weekends. In some areas I’ve had to omit some finer details because it would make the article way too long and I’d probably run out of steam and never finish it: think of it as a “getting started” tutorial. I hope it is useful and interesting. Now to get on with some of those household tasks I’ve put off whilst writing this – and thanks to my partner, Alison Tovey, who has waited patiently (well, almost :-)) whilst I was glued to WordPress!
Introduction
Modern TeX(-based) engines, such as XeTeX and LuaTeX, provide direct access to using OpenType fonts, albeit using different philosophies/methods. This post looks at just one way to use TrueType-flavoured OpenType fonts with the traditional TeX–DVIPS–PostScript–PDF workflow which is usually associated with the 8-bit world of Type 1 PostScript fonts. The idea is that we’ll convert TrueType-flavoured OpenType fonts to Type 42 PostScript fonts and include the Type 42 font data into DVIPS’s PostScript output stream using the DVIPS -h filename mechanism. In addition, we’ll look at using font encoding and the creation of TeX Font Metrics to enable access to the rich set of glyphs in a modern TrueType-flavour OpenType font.
Many Truetype-flavoured OpenType fonts (and thus the resulting Type 42 PostScript font) contain hundreds, if not thousands, of glyphs – making the 8-bit world of the traditional PostScript Encoding Vector little more than a tiny window into the rich array of available glyphs. By re-encoding the base Type 42 font we can generate a range of 256-character fonts for TeX and DVIPS to exploit the full range of glyphs in the original TrueType font – such as a true small caps font if the TrueType font has them.
We will also need to create the TeX Font Metrics (TFMs) so that TeX can access the metric data describing our fonts – the width, height, depth plus any kerning and linatures we care to add. Of course, the virtual font mechanism is also a valid approach – see Virtual Fonts: More Fun for Grand Wizards for more details. Much of what we’re doing here uses a number of freely available software tools to extract key data from the actual OpenType font files for onward processing into a form suitable for TeX.
Context of these experiments
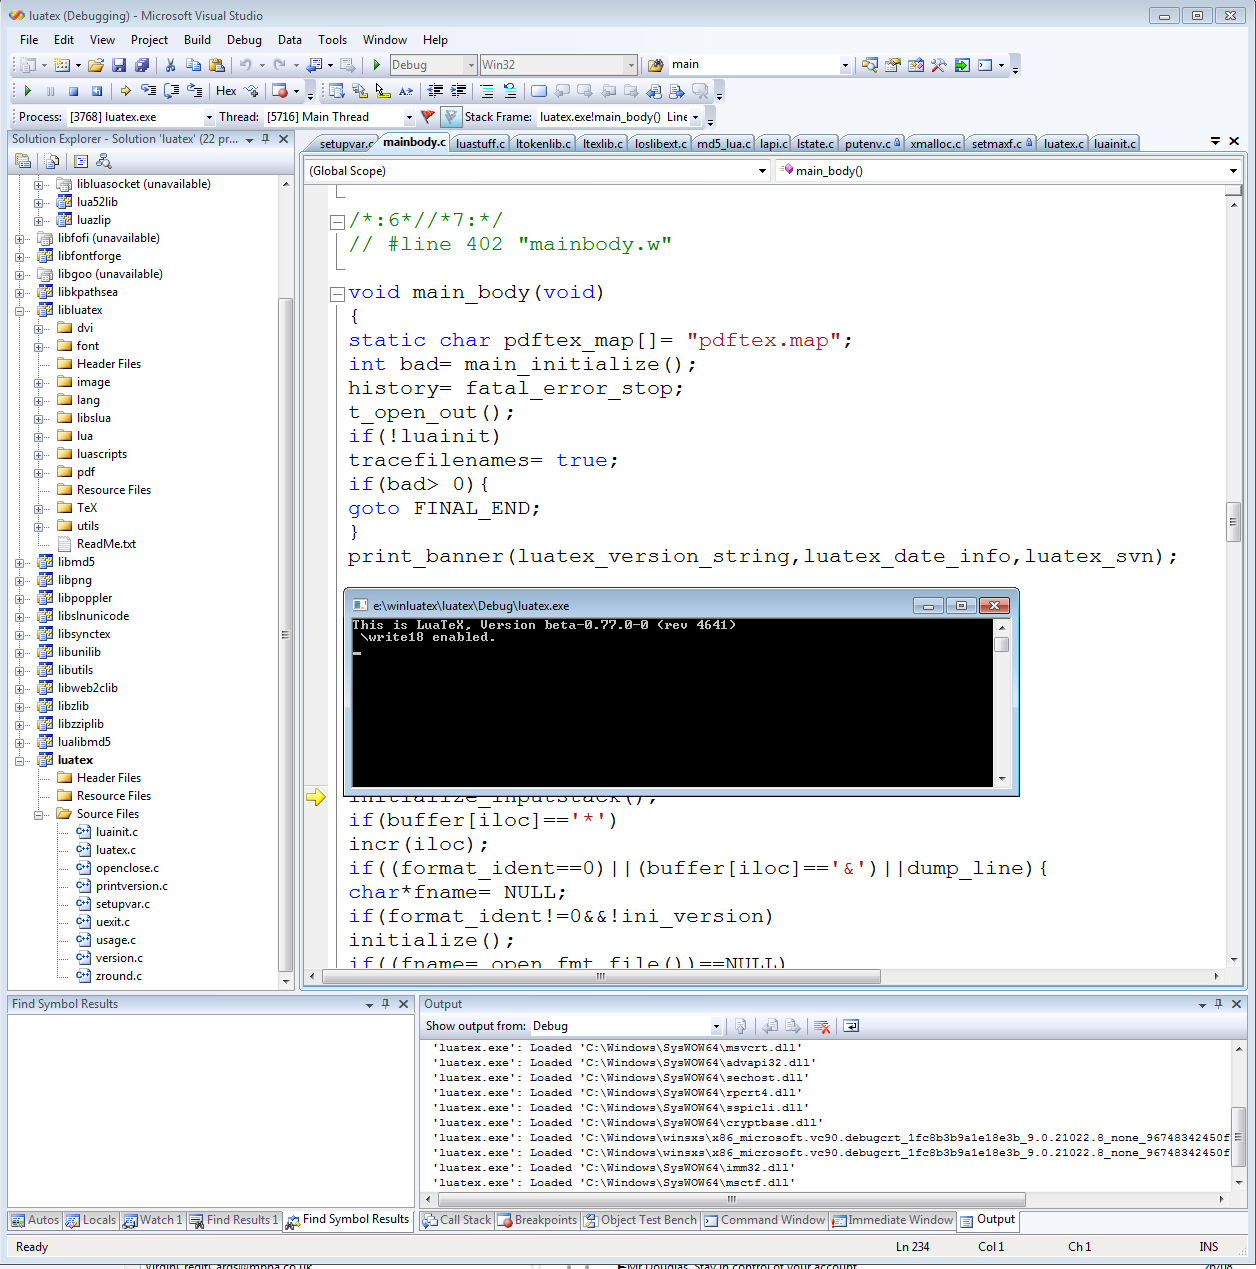
Over the past few weeks I’ve spent some evenings and weekends building TeX and friends from WEB source code, using Microsoft’s Visual Studio. At the moment, this all resides in a large Visual Studio project containing all the various applications and is a little “Heath Robinson” at the moment, although it does work. Within each of my builds of TeX and friends I’ve replaced the venerable Kpathsea path/file-searching library with my one of own creation – which does a direct search using recursive directory traversal. I’m also toying with using database-lookup approach, hence the appearance of SQLite in the list of C libries within the screenshot.

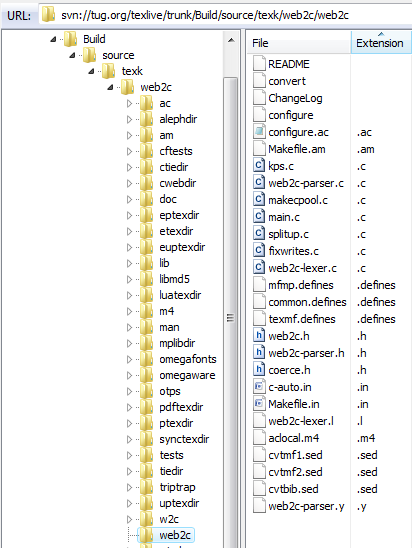
Turning to Eddie Kohler’s marvellous LCDF Typetools collection, I used MinGW/MSYS to build this. LCDF Typetools contains some incredibly useful tools for working with fonts via TeX/DVIPS – including ttftotype42 which can generate a Type 42 PostScript font from TrueType-flavoured OpenType fonts. You can think of a Type 42 font as a PostScript “wrapper” around the native TrueType font data, allowing you to insert TrueType fonts into PostScript code.
Characters, glyphs, glyph names, encodings and glyph IDs
Firstly, we need to review several interrelated topics: characters, glyphs, glyph names, encodings and glyph IDs (contained in OpenType fonts). Let’s begin by thinking about characters. A character can be considered as the fundamental building block of a language: it is, if you like, an “atomic unit of communication” (spoken or not) which has a defined role and purpose: the character’s meaning (semantics). Most characters usually need some form visual representation; however, that visual representation may not be fixed: most characters of a human spoken/written language can be represented in different forms. For example, the character ‘capital H’ (H) can take on different visual appearances depending on the font you use to display it. Fonts come in different designs and each design of our ‘capital H’ is called a glyph: a specific visual design which is particular to the font used to represent the ‘capital H’. Each character that a font is capable of displaying will have a glyph designed to to represent it – not only that but you may have a fancy font that contains multiple representations for a particular character: small caps, italic, bold and so forth. Each of these variants uses a different glyph to represent the same character: they still represent the same fundamental “unit of meaning” (a character) just using different visual forms of expression (glyphs).
If we look around us we see, of course, that there are hundreds of languages in our world and if we break these languages down into their core units of expression/meaning we soon find that many thousands of characters are needed to “define” or encompass these languages. So, how do we go about listing these characters and, more to the point, communicating in these languages through e-mails, text files, printed documents and so forth? As humans we refer to characters by a name (e.g., ‘capital H’) but computers, obviously, deal with numbers. To communicate our characters by computer we need a way to allocate an agreed set of numbers to those characters so that we can store or transmit them electronically. And that’s called the encoding. An encoding is simply an agreed set of numbers assigned to an agreed set of characters – so that we can store those numbers and know that our software will eventually display the correct glyphs to provide visual expression of our characters. To communicate using numbers to represent characters both sides have to agree on the encoding (mapping of numbers to characters) being used. If I save my text file (a bunch of numbers) and you open it up then your software must interpret those numbers in the same way I did when I wrote the text. Clearly, it’s essential for encoding standards to exist and perhaps the most well known is, of course, the Unicode standard which allocates a unique number to well over 100,000 characters (at present), with new characters being added from time-to-time as the Uniciode standard is updated.
Let’s take closer at fonts. We’ve seen that the job of a font is to provide the glyphs which represent a certain set of characters. Naturally, any particular font will only contain glyphs to represent a small subset of the world’s characters: there are just too many for any single font to contain them all. We’ve also said that some fonts may contain multiple glyphs to represent the same character. Considering OpenType fonts for the moment, within each font the individual glyphs (designs representing a specific chartacter) are each given a name and a numeric identifier, called the glyph identifier (also called the index or glyph ID). Each glyph is thus described by a (name, glyph ID) pair. It’s really important to realise that the glyph ID has nothing to do with encoding of characters: it is just an internal bookkeeping number used within the font and assigned to each glyph by the font’s creator. The numeric IDs assigned to a particular glyph are not defined by a global standard. Furthermore, the names given to glyphs also show a great deal of variation too, although there are some attempts at standardizing them: see the Adobe Glyph List which aims to provide a standard naming convention.
Let’s recap. We’ve seen that the fundamental “unit of communication” is the character and that characters are encoded by assigning each one to a number. We’ve also seen that fonts contain the designs, called glyphs, which represent the characters supported by the font. Internally, each (OpenType) font assigns every glyph an identifier (glyph ID) and a glyph name which may, or may not, be “standard”.
So, the next question we need to think about is: given a text file containing characters represented (stored) according to a specific encoding (a set of numbers), how does any font actually know how to map from a certain character in the text file to the correct glyph to represent it? After all, the encoding in the text file is usually based on a standard but the data in our font, glyph IDs and glyph names, are not standard? Well, not surprisingly there is indeed some extra bit of data inside the font which provides the glue and this is called the Encoding Vector (in older PostScript fonts) or character map (CMAP) table within the modern world of Unicode and OpenType fonts. The job of the Encoding Vector (or character map (CMAP)) is to provide the link between the standard world of encoded characters to the (relatively) non-standard inner font world of glyph IDs and glyph names.
A sneak peek at GentiumPlus-R: 5586 glyphs in a single font
For the remainder of this post I’ll use the free Gentium OpenType font (GentiumPlus-R) as an example because I do not want to inadvertantly infringe any commercial licence conditions in the work below. To help solidify the ideas described above I generated a table of all the glyphs (plus glyph ID and glyph name) contained within the GentiumPlus-R TrueType-flavour OpenType font.
GentiumPlus-R glyph chart
Technical details: To generate these glyph tables I wrote a command-line utility (in C) which used the FreeType library to extract the low-level data from inside the OpenType font. This data was written out as a PostScript program which loops over all the glyphs: drawing each glyph together with its glyph ID and name. This PostScript program was combined with the GentiumPlus (TrueType) font after converting it to a Type 42 PostScript font using ttftotype42 compiled from the source code distributed as part of the wonderful LCDF Typetools collection.
Download PDF
PostScript Encoding Vectors
Let’s recap on our objectives. We’ve explored the idea of glyphs, characters and encodings and seen that OpenType fonts can contain many thousands of glyphs to display thousands of characters. However, OpenType fonts can’t easily be used within the traditional TeX–DVIPS–PostScriptS–PDF workflow: most traditional TeX workflows use 8-bit characters and Type 1 PostScript fonts. As yet, we’ve still not explained exctly how a character code is “mapped” to a specific glyph in a font. So, it’s time to look at this, focussing on Type 1 and Type 42 PostScript fonts, ignoring OpenType fonts. The “magic glue” we need to explore is the so-called Encoding Vector present in Type 1 and Type 42 fonts. The job of the Encoding Vector is to map from character codes in the input to glyphs contained in the font. Let’s look at an example to make this clearer. I’ll assume that you have access to the ttftotype42 utility from the LCDF Typetools collection. If you don’t have it, or can’t compile it, contact me and I’ll e-mail my compiled version to you.
Using ttftotype42
If you run ttftotype42 on a TrueType-flavour OpenType font it will generate a fairly large plain text file which you can inspect with any text editor, so let’s do that. In these examples I’ll use the free Gentium OpenType font.
If you download GentiumPlus and place the GentiumPlus-R.ttf file in the same directory as ttftotype42 and run
ttftotype42 GentiumPlus-R.ttf GentiumPlus.t42
you should generate a file GentiumPlus.t42 which is a little over 2MB in size – remember, the GentiumPlus font contains over 5,500 glyphs! Loosely speaking you can think of the Type 42 font generated by ttftotype42 as being made up from the following sections:
- PostScript header
- Encoding Vector
- /sfnts glyph data array
- /CharStrings dictionary
- PostScript trailer
Download GentiumPlus.t42: I uploaded the Type 42 font file GentiumPlus.t42 created by ttftotype42 onto this site: you can download it here.
Here’s an extract from the Type 42 font version of GentiumPlus-R.ttf with vast amouts of data snipped out for brevity:
%!PS-TrueTypeFont-65536-98828-1
%%VMusage: 0 0
11 dict begin
/FontName /GentiumPlus def
/FontType 42 def
/FontMatrix [1 0 0 1 0 0] def
/FontBBox [-0.676758 -0.463867 1.49951 1.26953] readonly def
/PaintType 0 def
/XUID [42 16#30C4BB 16#E5CA1A 16#75CC0A 16#BE5D07 16#47E1FB 16#4C] def
/FontInfo 10 dict dup begin
/version (Version 1.510) readonly def
/Notice (Gentium is a trademark of SIL International.) readonly def
/Copyright (Copyright \(c\) 2003-2012, SIL International \(http://scripts.sil.org/\)) readonly def
/FullName (Gentium Plus) readonly def
/FamilyName (Gentium Plus) readonly def
/Weight (Regular) readonly def
/isFixedPitch false def
/ItalicAngle 0 def
/UnderlinePosition -0.146484 def
/UnderlineThickness 0.0488281 def
end readonly def
/Encoding 256 array
0 1 255{1 index exch/.notdef put}for
dup 13 /nonmarkingreturn put
dup 32 /space put
dup 33 /exclam put
dup 34 /quotedbl put
dup 35 /numbersign put
dup 36 /dollar put
dup 37 /percent put
dup 38 /ampersand put
...
...
-- snipped lots of lines of the encoding vector --
...
...
dup 254 /thorn put
dup 255 /ydieresis put
readonly def
/sfnts[
<00010000.......
...
...
-- snipped vast amounts of glyph data --
...
...
] def
/CharStrings 5586 dict dup begin
/.notdef 0 def
/.null 1 def
/nonmarkingreturn 2 def
/space 3 def
/exclam 4 def
/quotedbl 5 def
/numbersign 6 def
...
...
-- snipped vast amounts of CharStrings data --
...
...
end readonly def
FontName currentdict end definefont pop
The section of interest here is the Encoding Vector which is reproduced in full:
/Encoding 256 array
0 1 255{1 index exch/.notdef put}for
dup 13 /nonmarkingreturn put
dup 32 /space put
dup 33 /exclam put
dup 34 /quotedbl put
dup 35 /numbersign put
dup 36 /dollar put
dup 37 /percent put
dup 38 /ampersand put
dup 39 /quotesingle put
dup 40 /parenleft put
dup 41 /parenright put
dup 42 /asterisk put
dup 43 /plus put
dup 44 /comma put
dup 45 /hyphen put
dup 46 /period put
dup 47 /slash put
dup 48 /zero put
dup 49 /one put
dup 50 /two put
dup 51 /three put
dup 52 /four put
dup 53 /five put
dup 54 /six put
dup 55 /seven put
dup 56 /eight put
dup 57 /nine put
dup 58 /colon put
dup 59 /semicolon put
dup 60 /less put
dup 61 /equal put
dup 62 /greater put
dup 63 /question put
dup 64 /at put
dup 65 /A put
dup 66 /B put
dup 67 /C put
dup 68 /D put
dup 69 /E put
dup 70 /F put
dup 71 /G put
dup 72 /H put
dup 73 /I put
dup 74 /J put
dup 75 /K put
dup 76 /L put
dup 77 /M put
dup 78 /N put
dup 79 /O put
dup 80 /P put
dup 81 /Q put
dup 82 /R put
dup 83 /S put
dup 84 /T put
dup 85 /U put
dup 86 /V put
dup 87 /W put
dup 88 /X put
dup 89 /Y put
dup 90 /Z put
dup 91 /bracketleft put
dup 92 /backslash put
dup 93 /bracketright put
dup 94 /asciicircum put
dup 95 /underscore put
dup 96 /grave put
dup 97 /a put
dup 98 /b put
dup 99 /c put
dup 100 /d put
dup 101 /e put
dup 102 /f put
dup 103 /g put
dup 104 /h put
dup 105 /i put
dup 106 /j put
dup 107 /k put
dup 108 /l put
dup 109 /m put
dup 110 /n put
dup 111 /o put
dup 112 /p put
dup 113 /q put
dup 114 /r put
dup 115 /s put
dup 116 /t put
dup 117 /u put
dup 118 /v put
dup 119 /w put
dup 120 /x put
dup 121 /y put
dup 122 /z put
dup 123 /braceleft put
dup 124 /bar put
dup 125 /braceright put
dup 126 /asciitilde put
dup 160 /uni00A0 put
dup 161 /exclamdown put
dup 162 /cent put
dup 163 /sterling put
dup 164 /currency put
dup 165 /yen put
dup 166 /brokenbar put
dup 167 /section put
dup 168 /dieresis put
dup 169 /copyright put
dup 170 /ordfeminine put
dup 171 /guillemotleft put
dup 172 /logicalnot put
dup 173 /uni00AD put
dup 174 /registered put
dup 175 /macron put
dup 176 /degree put
dup 177 /plusminus put
dup 178 /twosuperior put
dup 179 /threesuperior put
dup 180 /acute put
dup 181 /mu put
dup 182 /paragraph put
dup 183 /periodcentered put
dup 184 /cedilla put
dup 185 /onesuperior put
dup 186 /ordmasculine put
dup 187 /guillemotright put
dup 188 /onequarter put
dup 189 /onehalf put
dup 190 /threequarters put
dup 191 /questiondown put
dup 192 /Agrave put
dup 193 /Aacute put
dup 194 /Acircumflex put
dup 195 /Atilde put
dup 196 /Adieresis put
dup 197 /Aring put
dup 198 /AE put
dup 199 /Ccedilla put
dup 200 /Egrave put
dup 201 /Eacute put
dup 202 /Ecircumflex put
dup 203 /Edieresis put
dup 204 /Igrave put
dup 205 /Iacute put
dup 206 /Icircumflex put
dup 207 /Idieresis put
dup 208 /Eth put
dup 209 /Ntilde put
dup 210 /Ograve put
dup 211 /Oacute put
dup 212 /Ocircumflex put
dup 213 /Otilde put
dup 214 /Odieresis put
dup 215 /multiply put
dup 216 /Oslash put
dup 217 /Ugrave put
dup 218 /Uacute put
dup 219 /Ucircumflex put
dup 220 /Udieresis put
dup 221 /Yacute put
dup 222 /Thorn put
dup 223 /germandbls put
dup 224 /agrave put
dup 225 /aacute put
dup 226 /acircumflex put
dup 227 /atilde put
dup 228 /adieresis put
dup 229 /aring put
dup 230 /ae put
dup 231 /ccedilla put
dup 232 /egrave put
dup 233 /eacute put
dup 234 /ecircumflex put
dup 235 /edieresis put
dup 236 /igrave put
dup 237 /iacute put
dup 238 /icircumflex put
dup 239 /idieresis put
dup 240 /eth put
dup 241 /ntilde put
dup 242 /ograve put
dup 243 /oacute put
dup 244 /ocircumflex put
dup 245 /otilde put
dup 246 /odieresis put
dup 247 /divide put
dup 248 /oslash put
dup 249 /ugrave put
dup 250 /uacute put
dup 251 /ucircumflex put
dup 252 /udieresis put
dup 253 /yacute put
dup 254 /thorn put
dup 255 /ydieresis put
readonly def
The Encoding Vector is an array indexed by a number which runs from 0 to 255 and the value stored at each index position is the name of a glyph contained in the font. You have probably guessed that the index (0 to 255) is the numeric value of an input character. So, via the Encoding Vector with 256 potential character values as input, we can reach up to 256 individual glyphs contained in the font. (Note: I’m ignoring the PostScript glyphshow operator which allows access to any glyph if you know its name).
The full story (quoting from the Type 42 font specification) “The PostScript interpreter uses the /Encoding array to look up the character name, which is then used to access the /Charstrings entry with that name. The value of that entry is the glyph index, which is then used to retrieve the glyph description.”
However, there are 5586 glyphs in GentiumPlus so does this mean the remaining 5330 glyphs are wasted and unreachable? Of course that’s not true but we can only reach 256 glyphs via each individual Encoding Vector: the trick we need is font re-encoding. The Encoding Vector is not a fixed entity: you can amend it or replace it entirely with a new one to map character codes 0 to 255 to different glyphs within the font. I won’t give the full details here, although it’s quite simple to understand. What you do, in effect, is a bit of PostScript programming to “clone” some of the font data structures, give this “clone” a new PostScript font name and a new Encoding Vector which maps the 256 character codes to totally different glyphs. For some excellent tutorials on PostScript programming, including font re-encoding, I highly recommend reading the truly excellent Acumen Training Journal which is completely free. Specifically, November 2001 and December 2001 issues.
If you want a simple example to explore the ideas behind Encoding Vectors you can download this code example (with PDF) to see the results of re-encoding Times-Roman.
Hooking this up to TeX and DVIPS
Having discussed fonts, encoding and glyphs at some length we now move to the next task: how do we use these ideas with TeX and DVIPS? Let’s start with TeX. Here, I’m referring to the traditional TeX workflows that use TeX Font Metric (TFM) files. So what is a TFM? To do its typesetting work TeX’s algorithms need only some basic information about the font you want to use: it needs the metrics. TeX does not care about the actual glyphs in your font or what they look like, it needs a set of data that describes how big each glyph is: to TeX your glyphs are boxes with a certain width, depth and height. That’s not the whole story, of course, because TeX also needs some additional data called fontdimens which are a set of additional parameters that describe some overall characteristics of the font. For pure text fonts there are 7 of these fontdimens, for math fonts there are 13 or 22 depending on the type/role of the math font. These fontdimens are, of course, built into the TFM file.
Looking inside TFMs
TFM files are a highly compact binary file format and quite unsuitable for viewing or editing. However, you can convert a TFM file to a readable/editable text representation using a program called tftopl, which is part of most TeX distributions. The editable text version of a TFM is referred to as a property list file. At the start of a TFM file for a text font (e.g., cmr10.tfm) you should see the 7 fontdimens displayed like this:
(FONTDIMEN
   (SLANT R 0.0)
   (SPACE R 0.333334)
   (STRETCH R 0.166667)
   (SHRINK R 0.111112)
   (XHEIGHT R 0.430555)
   (QUAD R 1.000003)
   (EXTRASPACE R 0.111112)
   )
If you run tftopl on cmex10.tfm (math font with extensible symbols) you see 13 fontdimens displayed like this:
(FONTDIMEN
   (SLANT R 0.0)
   (SPACE R 0.0)
   (STRETCH R 0.0)
   (SHRINK R 0.0)
   (XHEIGHT R 0.430556)
   (QUAD R 1.0)
   (EXTRASPACE R 0.0)
   (DEFAULTRULETHICKNESS R 0.04)
   (BIGOPSPACING1 R 0.111111)
   (BIGOPSPACING2 R 0.166667)
   (BIGOPSPACING3 R 0.2)
   (BIGOPSPACING4 R 0.6)
   (BIGOPSPACING5 R 0.1)
   )
If you run tftopl on cmsy10.tfm (math symbol font) you see 22 fontdimens displayed like this:
(FONTDIMEN
   (SLANT R 0.25)
   (SPACE R 0.0)
   (STRETCH R 0.0)
   (SHRINK R 0.0)
   (XHEIGHT R 0.430555)
   (QUAD R 1.000003)
   (EXTRASPACE R 0.0)
   (NUM1 R 0.676508)
   (NUM2 R 0.393732)
   (NUM3 R 0.443731)
   (DENOM1 R 0.685951)
   (DENOM2 R 0.344841)
   (SUP1 R 0.412892)
   (SUP2 R 0.362892)
   (SUP3 R 0.288889)
   (SUB1 R 0.15)
   (SUB2 R 0.247217)
   (SUPDROP R 0.386108)
   (SUBDROP R 0.05)
   (DELIM1 R 2.389999)
   (DELIM2 R 1.01)
   (AXISHEIGHT R 0.25)
   )
The role of these fontdimens within math fonts is extremely complex. If you want to read about this in depth you can find a list of excellent articles in this post. In addition to the glyph metrics (height, width, depth) and fontdimens TFM files contain constructs for kerning and ligatures. There’s a lot of information already available on the inner details of TFMs so there’s no point repeating it here.
The bulk of a TFM file is concerned with providing the height, width and depth of the characters encoded into the TFM. And that brings up a very important point: individual TFM files are tied to a particular encoding. For example, right at the start of a cmr10.tfm file you should see something like this:
(FAMILY CMR)
(FACE O 352)
(CODINGSCHEME TEX TEXT)
(DESIGNSIZE R 10.0)
(COMMENT DESIGNSIZE IS IN POINTS)
(COMMENT OTHER SIZES ARE MULTIPLES OF DESIGNSIZE)
(CHECKSUM O 11374260171)
It contains the line (CODINGSCHEME TEX TEXT) telling you that the TFM is encoded using the TeX Text encoding scheme. Let’s examine this. Referring back to our discussion of PostScript Encoding Vectors, let’s take a look at the first few lines of the Encoding Vector sitting inside the Type 1 font file for cmr10 – i.e., cmr10.pfb. The first 10 positions are encoded like this:
dup 0 /Gamma put
dup 1 /Delta put
dup 2 /Theta put
dup 3 /Lambda put
dup 4 /Xi put
dup 5 /Pi put
dup 6 /Sigma put
dup 7 /Upsilon put
dup 8 /Phi put
dup 9 /Psi put
dup 10 /Omega put
And this is the key point: the character encoding in your TFM file has to match the encoding of your PostScript font (or a re-encoded version of it). If we look at the metric data for the corresponding characters encoded in the cmr10.tfm file we find:
(CHARACTER O 0
   (CHARWD R 0.625002)
   (CHARHT R 0.683332)
   )
(CHARACTER O 1
   (CHARWD R 0.833336)
   (CHARHT R 0.683332)
   )
(CHARACTER O 2
   (CHARWD R 0.777781)
   (CHARHT R 0.683332)
   )
(CHARACTER O 3
   (CHARWD R 0.694446)
   (CHARHT R 0.683332)
   )
(CHARACTER O 4
   (CHARWD R 0.666669)
   (CHARHT R 0.683332)
   )
(CHARACTER O 5
   (CHARWD R 0.750002)
   (CHARHT R 0.683332)
   )
(CHARACTER O 6
   (CHARWD R 0.722224)
   (CHARHT R 0.683332)
   )
(CHARACTER O 7
   (CHARWD R 0.777781)
   (CHARHT R 0.683332)
   )
(CHARACTER O 10
   (CHARWD R 0.722224)
   (CHARHT R 0.683332)
   )
(CHARACTER O 11
   (CHARWD R 0.777781)
   (CHARHT R 0.683332)
   )
(CHARACTER O 12
   (CHARWD R 0.722224)
   (CHARHT R 0.683332)
   )
Statements such as CHARACTER O 0 describe the metrics (just width and height in these examples) for the character with octal value 0, CHARACTER O 12 describes character with octal value 12 (i.e., 10 in denary (base 10)). Note that the values are relative to the (DESIGNSIZE R 10.0) which means, for example, that CHARACTER O 12 has a width of 0.722224 × 10 = 7.22224 points – because the DESIGNSIZE is 10 points. So, it is clearly vital that the encoding of your TFM matches the encoding of your PostScript font otherwise you’ll get the wrong glyphs on output and the wrong widths, heights and depths used by TeX’s typesetting calculations!
Using FreeType to generate raw metric data
FreeType is a superb C library which provides a rich set of functions to access many internals of a font, together, of course, with functions to rasterize fonts for screen display. Just to note, FreeType does not provide an OpenType shaping engine, for that you’ll need to use the equally superb libotf C library (which also uses FreeType). However, I digress. Using FreeType you can create some extremely useful and simple utilities to extract a wide range of data from font files to generate raw data for creating the TFM files and Encoding Vectors you’ll need to hook-up a Type 42 font to DVIPS and TeX. Let’s look at this is a little detail. The task at hand is: given an OpenType (TrueType) font, how can do you obtain details of the glyphs it contains: the names and metrics (width, height, depth)?
FreeType’s view of glyph metrics
The FreeType API provides access to the glyph metrics shown in the FreeType Glyph Conventions documentation. You should read this together with the Adobe’s Type 1 Font Format Specification (Chapter 3) to make sure you understand what is meant by a glyph’s width.
Simple examples of using the FreeType API
Here’s some ultra-basic examples, without any proper error checking etc, to show how you might use FreeType. You start by initializing the FreeType library (FT_Init_FreeType(...)), then create a new face object (FT_New_Face(...)) and use this to access the font and glyph details you need. The first example writes metric data to STDOUT, the second example processes the font data to create an Encoding Vectors and a skeleton property list file for creating a TFM. Note that is a “bare bones” TFM and does not generate any ligatures or kerning data. To generate a binary TFM from a property list file you need another utility called pltotf which is also part of most TeX distributions.
#include <windows.h>
#include <ft2build.h>
#include <freetype/t1tables.h>
#include <freetype/ftoutln.h>
#include <freetype/ftbbox.h>
#include FT_GLYPH_H
#include FT_FREETYPE_H

int main (int  ac,  char** av)
{
    FT_Library font_library;
    FT_Face    font_face;
    FT_BBox    bbox;

    int  glyph_index;
    int  glyph_count;
    char char_name[256];
    const char* fontfilepath = "PUT THE PATH TO YOUR FONT HERE";
    char buf[5];
    int err=1;

   if (FT_Init_FreeType( &font_library ) )
	{
	// Failed to init library,
	} else
	{
		if ( FT_New_Face( font_library, fontfilepath, 0 , &font_face ) )
		{
			// Managed to open library but failedto open the font
			FT_Done_FreeType(font_library);
			return err;
		}
		else {
			// library and font opened OK
			// find out the number of glyphs and process each glyph
			glyph_count = font_face->num_glyphs;
			for ( glyph_index = 0 ; glyph_index < glyph_count; glyph_index++ )
				{
                                // NOTE: FT_Get_Glyph_Name can FAIL for some TrueType-flavour
                                // OpenType fonts so you *really* do need to check the value of err!!
				err = FT_Get_Glyph_Name(font_face, glyph_index, &char_name[0], 32 );
				_itoa(glyph_index, buf, 10);
				// load the glyph with no scaling etc to get raw data
				FT_Load_Glyph(font_face,  glyph_index,  FT_LOAD_NO_SCALE);
				// get the bounding box of the raw glyph data
				FT_Outline_Get_BBox(&(font_face->glyph->outline), &bbox);
				printf( "/%s %ld def ",   char_name, glyph_index);
				printf("width=%ld ", font_face->glyph->metrics.width);
				printf("height=%ld ", font_face->glyph->metrics.height);
				printf("horiAdvance=%ld ", font_face->glyph->metrics.horiAdvance);
				printf("horiBearingX=%ld ", font_face->glyph->metrics.horiBearingX);
				printf("horiBearingY=%ld ", font_face->glyph->metrics.horiBearingY);
				printf("vertAdvance=%ld ",  font_face->glyph->metrics.vertAdvance);
				printf("vertBearingX=%ld ", font_face->glyph->metrics.vertBearingX);
				printf("vertBearingY=%ld ", font_face->glyph->metrics.vertBearingY);
				printf("xMax=%ld ", bbox.xMax);
				printf("yMax=%ld ", bbox.yMax);
				printf("yMin=%ld ", bbox.yMin);
				printf("xMin=%ld \n", bbox.xMin);
			}
		}
		FT_Done_FreeType(font_library);
	}
}
Creating an Encoding Vector and property list file
The following simple-minded function shows how you might use FreeType to generate an Encoding Vector and property list file. Reflecting the unusual glyphs we’re using, the output files are called weirdo.pl and weirdo.enc.
void makeweirdo(FT_Face font_face, char *name, int len)
{
FILE * vec;
FILE * plist;
int i;
FT_BBox bbox;
int k=32; // only encode positions 32--255

char *fname="your_path_here\\weirdo.enc";
char *pname="your_path_here\\weirdo.weirdo.pl";
char * header= "(COMMENT Created by Graham Douglas)\r\n\
(FAMILY WEIRDO)\r\n\
(CODINGSCHEME WEIRDO)\r\n\
(DESIGNSIZE R 10.0)\r\n\
(FONTDIMEN\r\n\
   (SLANT R 0.0)\r\n\
   (SPACE R 0.333334)\r\n\
   (STRETCH R 0.166667)\r\n\
   (SHRINK R 0.111112)\r\n\
   (XHEIGHT R 0.430555)\r\n\
   (QUAD R 1.000003)\r\n\
   (EXTRASPACE R 0.111112)\r\n\
   )\r\n";
	vec = fopen(fname, "wb");
	plist = fopen(pname, "wb");

	fprintf(vec,"%s", "/veccy 256 array 0 1 255 {1 index exch /.notdef put} for\r\n");
	fprintf(plist,"%s", header);

	// Here we are looping over GentiumPlus glyph IDs whose value is 5000 to 5223
	for (i=5000; i<5224; i++)
	{
		FT_Get_Glyph_Name(font_face, i, name, len);
		FT_Load_Glyph(font_face,  i,  FT_LOAD_NO_SCALE);
		FT_Outline_Get_BBox(&(font_face->glyph->outline), &bbox);
		fprintf(plist,"(CHARACTER O %o (COMMENT Glyph name is %s)\r\n", k, name);
		fprintf(plist,"    (CHARWD R %.5f)\r\n", font_face->glyph->metrics.horiAdvance/2048.0);
		fprintf(plist,"    (CHARHT R %.5f)\r\n", bbox.yMax/2048.0);
                // FreeType's depth values are negative, TeX Font Metrics are not
                // If bbox.yMin not negative then we don't output anything and TeX assumes zero depth
		if(bbox.yMin < 0)
		{
			fprintf(plist,"    (CHARDP R %.5f)\r\n", -1*bbox.yMin/2048.0);
		}
		fprintf(plist, "%s","    )\r\n");

	fprintf(vec, "dup %ld /%s put\r\n", k, name);
	k++;
	}
	fprintf(vec, "%s", " def\r\n");
	fclose(vec);
	fclose(plist);
}
Here is a small extract from weirdo.vec and weirdo.pl – if you wish to explore the output you can download them (and weirdo.tfm) in this zip file. (In the data below I followed the neat idea from LCDF Typetools and put the glyph name in as a comment).
weirdo.vec
/veccy
256 array 0 1 255 {1 index exch /.notdef put} for
dup 32 /uni1D9C.Dep50 put
dup 33 /uni1D9C.Dep41 put
dup 34 /uni023C.Dep51 put
dup 35 /uni023C.Dep50 put
....
dup 251 /uni024C.Dep51 put
dup 252 /uni024C.Dep50 put
dup 253 /uni2C64.Dep51 put
dup 254 /uni2C64.Dep50 put
dup 255 /uni1DB3.Dep51 put
def
weirdo.pl
(COMMENT Created by Graham Douglas)
(FAMILY WEIRDO)
(CODINGSCHEME WEIRDO)
(DESIGNSIZE R 10.0)
(FONTDIMEN
   (SLANT R 0.0)
   (SPACE R 0.333334)
   (STRETCH R 0.166667)
   (SHRINK R 0.111112)
   (XHEIGHT R 0.430555)
   (QUAD R 1.000003)
   (EXTRASPACE R 0.111112)
   )
(CHARACTER O 40 (COMMENT Glyph name is uni1D9C.Dep50)
    (CHARWD R 0.30566)
    (CHARHT R 0.59863)
    )
(CHARACTER O 41 (COMMENT Glyph name is uni1D9C.Dep41)
    (CHARWD R 0.30566)
    (CHARHT R 0.59863)
    )
(CHARACTER O 42 (COMMENT Glyph name is uni023C.Dep51)
    (CHARWD R 0.43701)
    (CHARHT R 0.55811)
    (CHARDP R 0.09033)
    )
(CHARACTER O 43 (COMMENT Glyph name is uni023C.Dep50)
    (CHARWD R 0.43701)
    (CHARHT R 0.55811)
    (CHARDP R 0.09033)
    )
(CHARACTER O 44 (COMMENT Glyph name is uni023C.Dep41)
    (CHARWD R 0.43701)
    (CHARHT R 0.55811)
    (CHARDP R 0.09033)
    )
(CHARACTER O 45 (COMMENT Glyph name is uni1D9D.Dep51)
    (CHARWD R 0.30566)
    (CHARHT R 0.59863)
    )
(CHARACTER O 46 (COMMENT Glyph name is uni1D9D.Dep50)
    (CHARWD R 0.30566)
    (CHARHT R 0.59863)
    )

...
...
...

(CHARACTER O 375 (COMMENT Glyph name is uni2C64.Dep51)
    (CHARWD R 0.56104)
    (CHARHT R 0.64453)
    (CHARDP R 0.20020)
    )
(CHARACTER O 376 (COMMENT Glyph name is uni2C64.Dep50)
    (CHARWD R 0.56104)
    (CHARHT R 0.64453)
    (CHARDP R 0.20020)
    )
(CHARACTER O 377 (COMMENT Glyph name is uni1DB3.Dep51)
    (CHARWD R 0.27002)
    (CHARHT R 0.59863)
    )
To generate the binary TFM file weirdo.tfm from weirdo.pl run pltotf:
pltotf weirdo.pl weirdo.tfm
I had to round some heights by 0.0002451 units.
I got a warning from pltotf, but I don’t think it is too serious. To use the TFM you’ll need to put it in a suitable location within your TEXMF tree.
Hooking up to DVIPS
We’ve covered a huge range of topics so it is time to recap. So far, we’ve generated an Encoding Vector (weirdo.vec) based on the names of glyphs (in the Gentium-Plus font) whose glyph IDs span the range 5000–5523. Within our Encoding Vector we mapped those glyph names to the character codes 32–255. We have also created a property list file, based on the same encoding, which simply contains the width, height and depth of the Gentium-Plus glyphs in the range 5000–5523. Our next task is to pull together the following items and convince DVIPS to use them.
- Re-encode
GentiumPlus.t42: We need to create a re-encoded font that uses our new Encoding Vector (weirdo.vec).
- Update
config.ps: We need to tell DVIPS how to use our new font by creating a .map file and making sure DVIPS can find that map file.
- Command-line switches: We’ll need to use some command-line switches to give DVIPS the info it needs to do its job.
- Our Type 42 font:
GentiumPlus.t42: We must tell DVIPS to embed that font into its PostScript output.
Our goal is to tell TeX to load a font (TFM) called weirdo and for DVIPS to know how to use and find the weirdo font data to generate the correct PostScript code to render our glyphs. We’ll use our strange new weirdo font like this (in plain TeX):
\font\weird=weirdo {\weird HELLO}
Note that the displayed output will not be the English word “HELLO” because we’ve chosen some rather strange glyphs from Gentium-Plus. The key observation is the input character codes are the ASCII values of the string HELLO; i.e. (in base 10):
H = 72

E = 69

L = 76

L = 76

O = 79
and our weirdo.enc Encoding Vector maps these character codes to the following glyphs:
72 = uni1D94.Dep51

69 = uni1D9F.Dep51

76 = uni0511.Dep50

79 = uni0510.Dep51
So, we can expect some strange output in the final PostScript or PDF file!
How do we do the re-encoding?
The basic idea is that we tell DVIPS to embed the GentiumPlus.t42 PostScript Type 42 font data into its PostScript output stream. We will then write some short PostScript headers that will do the re-encoding to generate our newly re-encoded font: which we’re calling weirdo. By using the DVIPS -h command-line switch we can get DVIPS to embed GentiumPlus.t42 and the header PostScript file to perform the re-encoding. For example:
DVIPS -h GentiumPlus.t42 -h weirdo.ps sometexfile.dvi
The actual re-encoding, and “creation”, of our weirdo font will be taken care of by the file weirdo.ps, which will also need to contain the weirdo.enc data. If you wish, you can download weirdo.ps. Here is the tiny fragment of PostScript required within weirdo.ps to “create” the weirdo font by re-encoding our Type 42 font whose PostScript name is GentiumPlus.
/otfreencode
{
	findfont dup length dict copy
	dup 3 2 roll /Encoding exch put
	definefont
	pop
} bind def

/weirdo veccy /GentiumPlus otfreencode
Note, of course, you could create a header PostScript file to generate multiple new fonts each with their own unique Encoding Vectors containing a range of glyphs from the Type 42 font.
Telling DVIPS how to use our new font
So far we’ve built the TFM file for TeX so now we need to tell DVIPS how to use it – so that it can process the weirdo font name as it parses the DVI file. DVIPS uses .map files to associate TFM file names with PostScript font names, together the actions DVIPS needs to take in order to process the font files and get the right PostScript font data into its output. These actions include processing/parsing Type 1 font files (.pfb, .pfa) and re-encoding Type 1 fonts. For our weirdo font the .map file is very simple: all we need to do is create a file called weirdo.map with a single line:
weirdo weirdo
This super-simple .map file says that the TeX font name (TFM file) weirdo is mapped to a PostScript font called weirdo (as defined by the code in weirdo.ps). It also tells DVIPS that no other actions are needed because we’re not doing the re-encoding, here nor are we asking DVIPS to process a Type 1 font file (.pfb) file associated with weirdo – because there isn’t one! After you have created weirdo.map you’ll need to edit the DVIPS’s configuration file config.ps to tell DVIPS to use weirdo.map. Again, this is easy and all you need to do is add the following instruction to config.ps:
p +weirdo.map
Does it work?
Well, I’d have wasted many hours if it didn’t :-). I used the following simple plain TeX example (test.tex) which I processed using my personal build of TeX for Windows (which does not use Kpathsea).
\hsize=300pt
\vsize=300pt
\font\smallweird=weirdo at 12pt
Dear \TeX\ I would like to say HELLO in weirdo so {\smallweird HELLO}. I would also like to see
a lot of strange glyphs so I'll input a text file containing  some of them: {\smallweird \input weirdchars }.
\bye
Download weirdchars.tex
The resulting DVI file was processed to PostScript using a standard build of DVIPS with the following command line:
DVIPS -h GentiumPlus.t42 -h weirdo.ps test.dvi
The resulting PostScript file is large because the GentiumPlus.t42 file is over 2MB. However, the PDF file produced by Acrobat Distiller was about 35KB because the Type 42 font (GentiumPlus.t42) was subsetted.
Download PDF
Concluding thoughts
“Alison, I’m ready to do the gardening. What?, it’s too late. That’s a shame.” 🙂