A summary of what we are going to do next
This is going to be a pretty long post, and I’ve been working on it for days! I’ve been trying to get the right flow of ideas and the level of technical detail and concepts “just right”. We’ll cover a lot of ground, skimming over some deep details, but hopefully end up with something that is useful. As always, you are the main audience and judges of whether this content is a useful addition to “the blogosphere”: if you want to comment, please do.
In this part of the tutorial we’ll work towards a minimal LuaTeX installation using one of the simplest TeX formats: Donald Knuth’s plain TeX format, as described in The TeXbook. To do this we will be taking the following steps in the process:
- Identify all the various files and resources that LuaTeX will need to process a document written in the plain TeX format.
- Work out the best way to organise these various file types on your hard drive.
- Work out how we will tell Kpathsea where to find these files:
- using environment variables;
- using a minimal hand-written
texmf.cnffile.
- Build the plain TeX format file (
plain.fmt).
What we are going to leave for later: staying simple
We are going to ignore the (wonderful world of) OpenType fonts (for now) and stay with the far simpler Adobe Type 1 PostScript fonts. In addition, we are not going to explore any LuaTeX-specific features such as\directlua{...}, purely to keep the discussion as simple as possible at this point.
The plain TeX format
Knuth’s plain TeX format is described in great detail in The TeX Book, and has the advantage that it requires requires just two files to build the format file:
- plain.tex
- hyphen.tex
Where do you get these files?
I’d recommend grabbing them from the Comprehensive TeX Archive Network (CTAN). They can be downloaded from CTAN, here: http://www.ctan.org/tex-archive/macros/plain/base/. Alternatively, you can browse TeX Live.
Step 1: What other files and resources does LuaTeX need for plain TeX?
When Donald Knuth wrote the original TeX engine, the output of “TeXing a document” was something called a DeVice Independent file (referred to from now on as a DVI file). Describing the DVI file format in detail is beyond the scope of this post and there are plenty of resources on the web which you can access for more detail; for example, the UK TUG FAQ is a good starting point, as is the Wikipedia entry.
Newer TeX engines have, of course, been developed to output PDF files in addition to DVI files, most notably, starting with pdfTeX. LuaTeX can be seen as an extension of pdfTeX and also outputs PDF directly.
Input, typesetting and output (DVI vs PDF)
To help with understanding the following sections, it will be useful to consider the “typesetting process” as built up of three fundamental activities:
- reading in the text to be typeset
- the TeX engine executing its internal functions and algorithms: “typesetting”; i.e., breaking paragraphs into lines, constructing mathematical formulae and so forth
- the process of writing the typeset result to a file (a DVI or PDF)
For current purposes, it is the process of “writing the typeset result to a file” which we need to discuss. Compared to writing DVI files, when writing PDF files TeX engines need access to additional resources, and that is going to affect the resources we need to make available through our setup and installation. Of course, both DVI and PDF files contain a representation the typesetting work done by the TeX engine; however, they differ in one very important way: PDF files output directly by TeX engines embed (i.e., write into) the PDF file the actual data required to display fonts, whereas DVI files do not. You can think of the DVI file format as an “intermediate file format” which provides a description of the typeset results, but to visualise the results described by DVI files they have to be processed by external applications. It is the job of these external applications, often called “drivers”, to make sure that they have access to the data required to display fonts: whether on a screen, on a desktop printer or any other device. The philosophy behind the design of the DVI file format was to create a representation of the typeset result which could then be output on any device through the use of the appropriate “device driver software”: leaving the messy device-dependent details to external applications. Hence the name DeVice Independent file. It also explains (in part!) why DVI files are tiny compared to their PDF counterparts: DVI files do not contain font (glyph) data (or images etc), whereas those resources are embedded into PDF files produced by TeX engines.
In summary, the most important point for us is that for TeX to output a DVI file it does not need access to the actual data required to display the fonts used in your document. Now, if you are new to TeX this may seem very strange and almost a contradiction: a typesetting program that does not need access to fonts? To explain this, we need to be very clear on precisely what conventional or original TeX engines actually understand by “a font”.
Of metrics, characters, glyphs and encodings
The subject of fonts is a huge topic, one I intend to write about in future posts, but for now I need to introduce four key concepts at this point in the story: metrics, characters, glyphs and encodings.
Characters and glyphs
I thought long and hard about how to explain the difference between characters and glyphs but I think the the Unicode standard does it as well as anything I’ve read, so I’d like to quote from the Unicode standard (version 6.0) which says:
Characters are the abstract representations of the smallest components of written language that have semantic value. They represent primarily, but not exclusively, the letters, punctuation, and other signs that constitute natural language text and technical notation.
Glyphs represent the shapes that characters can have when they are rendered or displayed. In contrast to characters, glyphs appear on the screen or paper as particular representations of one or more characters.
So, you can think of a character as being the name of a fundamental building block of a language (e.g., the letter ‘capital A’) and a glyph is a character being expressed in a specific visual form. So, for example, the following SVG graphic show 4 glyphs representing the character ‘capital A’:
Metrics
Firstly, I must stress again, that I am not discussing OpenType font technology but restricting the discussion to the older world of Adobe Type 1 fonts for use with plain TeX. As far as TeX engines are concerned, to do their job of typesetting they treat glyphs as simple boxes and all they want to know is three simple values for each glyph you want to typeset: width, height and depth. This set of numbers are called metrics.
Now, I have deliberately used the term glyph, not character, because a glyph is the visual representation of a character and, clearly, it is the ‘size’ of the glyph boxes that TeX wants to know. For example, you can easily see this because if you type a row of characters, say, ‘capital A’, in Microsoft Word and apply a different typeface to each one then it should be clear that the width of each glyph depends on the typeface you have applied: i.e., the specific visual representation, i.e., the glyph. So, when you use a paricular “font” with TeX, all that TeX is worried about are the metrics which provide numeric information about the glyphs. The typesetting algorithms inside the TeX engine do not care about the specifics of what the glyph looks like, it just wants the metrics so that it can calculate line breaks, compute the layout of a formula or where to end the page.
TeX font metric files
When the TeX engine is typesetting your document, breaking paragraphs into lines, constructing mathematical formulae, all it wants to know are some numeric values about the glyphs in the fonts you are using. It does not care about what the individual glyphs actually look like.
Metrics in reality: more than just width, height, depth
I have simplified the discussion somewhat. The actual metrics used by TeX engines include a range of additional data values which I won’t discuss here but I just want to note that real metrics contain more data than just width, height and depth of glyphs. Actually, in reality, there are two classes of metrics that TeX engines require: metrics for text fonts and metrics for math fonts. To typeset mathematics, TeX engines need some additional numbers (metrics) which the TeX engine uses to control the processes which construct the typeset formula.
Encodings
Font encoding is a messy topic, one which is impossible to cover thoroughly in a few lines. So, my apologies in advance to any experts reading this, but I’m aiming for “minimal simplicity”, at this point. Although a pretty obvious thing to say, what we need to realise is that when software is storing or processing text data, it is actually working with numbers: numbers which represent characters. When it comes to displaying the text (which internally is being stored as numbers) there has a be a process to decide which characters are actually being represented by that set of numbers. We need some form of “mapping” from those numbers to the characters they are expected represent. That mapping is called… the encoding. An encoding is simply a set of numbers which are allocated to a specific range of characters.
Introduction to Adobe Type 1 PostScript fonts (ignoring OpenType)
To assist with the discussions, we should think of a “font” as consisting of two files:
- the font metrics: a file containing numeric data describing the width, height, depth of the glyphs in the font. Again, I stress this is a simplification because real metric files contain a range of additional data.
- the font glyphs: this is the data which describes how to draw the glyphs themselves, i.e., the lines and curves from which glyph shapes are built.
Within the world of Adobe Type 1 PostScript fonts, the font metric files are called Adobe Font Metrics or AFM files (.afm) and the font glyphs (on Windows) are stored in a separate file called Printer Font Binary (PFB or .pfb files). AFM files are a simple text file format whereas PFB files are a compact binary format.
Do TeX engines use Adobe Font Metrics files?
No. TeX engines expect their metric files in a very specific format called the TeX Font Metric (TFM, .tfm) format. This is a highly compact binary format, unlike Adobe’s AFM format. Of course, there are utilities to convert from AFM files to TFM files for use with TeX; for example, afm2tfm.exe shipped with TeX Live.
Answer to: What other files and resources does LuaTeX need for plain TeX?
Finally, we are in a position to answer this question. For LuaTeX to successfully output a PDF file containing the typeset results it needs access to:
- TeX Font Metric files (extension
.tfm) - Font encoding files (extension
.enc) - Glyph data files (extension
.pfb, on Windows) - The plain TeX format file (extension
.fmt) - The file(s) containing your document (extension
.texetc) - And one we have not explained:
.mapfiles (specifically for pdfTeX)
In addition, of course, to any graphics you want to include but we’ll leave graphics to the LaTeX format.
pdfTeX and .map files: a primer
We have noted that TeX engines such as pdfTeX and LuaTeX can output direct to PDF but to do so they need access to the actual font data files which contain the descriptions of what the glyphs look like (.pfb files on Windows) so that they can embed this data into the PDF. We have seen that, for the pure typesetting purposes, TeX engines only need access to TeX font metrics. The magic ingredient which connects the two is called a font map file and is a specific requirement for pdfTeX-related TeX engines. Quoting a slightly edited extract from the pdfTeX manual:“Font map files provide the connection between TeX tfm font files and the outline font file names (.pfb files). They contain also information about re-encoding arrays, partial font embedding (“subsetting”), and character transformation parameters (like SlantFont and ExtendFont). Those map files were first created for dvi postprocessors. But, as pdfTeX in pdf output mode includes all pdf processing steps, it also needs to know about font mapping, and therefore reads in one or more map files. Map files are not read in when pdfTeX is in dvi mode. By default, pdfTeX reads the map file pdftex.map. In Web2c, map files are searched for using the TEXFONTMAPS config file value and environment variable.”
Step 2: Work out the best way to organise these various file types on your hard drive
So we have identified the resources that LuaTeX needs, we now need to think about how should we organise these files in the most appropriate way: i.e., a suitable directory structure. Readers who have been following this set of tutorials may already have seen the posting on the TeX Directory Structure (TDS), and that’s what I’ll use to guide the remainder of this tutorial.
Reminder: Kpathsea!
Don’t forget that the Kpathsea path-searching library (built into LuaTeX) is the vital component that will be searching through the TDS directory structure to locate the files and resources that LuaTeX will be looking for. Consequently, it is a good idea to make sure that your directory structure is optimised to make the best use of Kpathsea, so that LuaTeX can find files as fast as possible.
You can have multiple TDS trees: thanks to Kpathsea!
The Kpathsea library supports the use of multiple TDS trees so that you can split a big TeX installation into multiple directory structures, providing flexibility to manage your TeX installation. A paper by By Michael J Downes: Managing Multiple TDS Trees covers this in some detail.
Quoting from this document:
“In this document, we shall designate the root TDS directory by “texmf” (for “TEX and METAFONT”). We recommend using that name where possible, but the actual name of the directory is up to the installer. On PC networks, for example, this could map to a logical drive specification such as T:. Similarly, the location of this directory on the system is site-dependent. It may be at the root of the file system; on Unix systems,
/usr/local/share,/usr/local, /usr/local/lib, and/optare common choices.”
So, our first task is to create a directory structure which is rooted in a directory called “texmf”. As the TDS specification says “the location of this directory on the system is site-dependent” so we can put it wherever we choose. On my PC I’m going to use
c:\luatexblog\texmf
Further, section 3 Top-level directories of the TDS specification says that “the directories under the texmf root identify the major components of a TeX system”. However, the TDS specification also notes (section A Unspecified pieces) that the location of certain file types is not covered by the recommendations:
- The location of executable programs is too site-dependent to recommend a location. A site may place executables outside the texmf tree altogether, in a platform-dependent directory within texmf, or elsewhere.
- The location of implementation-specific files (e.g., TeX
.fmtfiles): by their nature, these must be left to the implementor or TeX maintainer.
So, where we put the luatex.exe file and the plain TeX .fmt file is up to us. The Kpathsea documentation (currently for version 6, July 2010) gives a nice example of a skeleton TDS which I’ll use for our minimal install for plain TeX. Based on the reasoning above, we need to define directories which contain:
- TeX Font Metric files (extension
.tfm) - Font encoding files (extension
.enc) - Glyph data files (extension
.pfb, on Windows) - The plain TeX format file (extension
.fmt) - The plain TeX source files (plain.tex and hyphen.tex)
.mapfiles (specifically for pdfTeX)
These will be subdirectories of c:\luatexblog\texmf. Starting with the font-related directories, we’ll create a set of directories which follow the structure:
c:\luatexblog\texmf\fonts\[type]\[supplier]\[typeface]
Where [type] will be
- tfm: for
.tfmfiles (TeX font metrics) - type1: for
.pfbfiles (Printer Font Binary)
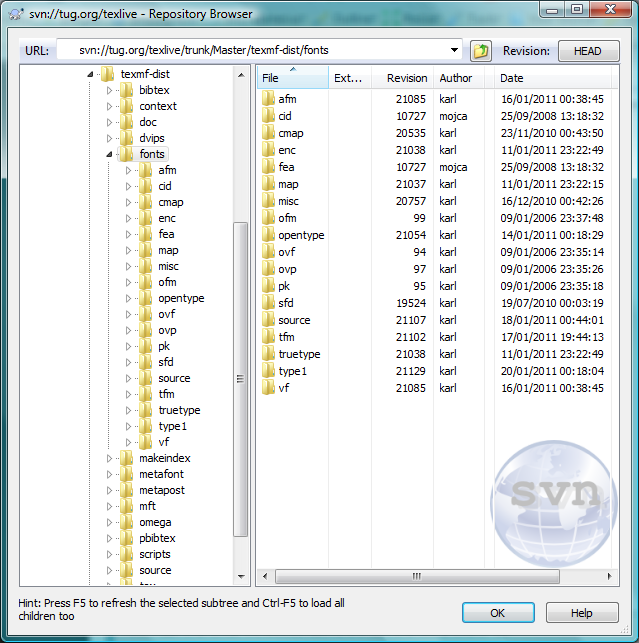
Where [supplier] will be public (i.e., for free fonts) and [typeface] will simply be cm (for Computer Modern). You can see this is the directory structure used on TeX Live:
In addition, under c:\luatexblog\texmf\fonts\ we’ll need to create directories for
- map: for
.mapfiles (pdfTeX and LuaTeX font mapping files) - enc: for
.encfiles (font encoding)
Now we just need a directories to contain
- plain TeX source files (plain.tex and hyphen.tex)
- the plain TeX .fmt file
- the texmf.cnf file that we’ll write for Kpathsea
As discussed in previous posts, Kpathsea uses a mixture of environment variables and configuration files (called texmf.cnf) to perform its path-searching magic. Actually, it uses a fairly complex interplay between environment variables and variables named in configuration files. I’m not going to explore this because it is described, in detail, in the Kpathsea documentation.
Giving Kpathsea a starting point
Clearly, when you start LuaTeX (and hence Kpathsea) there has got to be some way for the Kpathsea library to “hook into” your computer setup, a kind of “entry point” if you like so that it knows where to find your texmf.cnf file(s). You do this by setting an environment variable called TEXMFCNF which tells Kpathsea where to start looking for your configuration files (texmf.cnf).
Debugging Kpathsea searches
Most of us have, at one time or another, experienced situations where the TeX engine cannot locate a particular file or class of files. This can be rather frustrating so it is well worth setting a couple of environment variables to switch on Kpathsea’s debugging (creating a log file): telling you where Kpathsea is looking for a particular file, or type of file. This can be extremely helpful to diagnose “can’t find file” errors. The environment variables you need to set are KPATHSEA_DEBUG and KPATHSEA_DEBUG_OUTPUT.
KPATHSEA_DEBUG_OUTPUT: this is the path and name of the log file to record the debug output (for example,KPATHSEA_DEBUG_OUTPUT=c:/kspsluatex.log).KPATHSEA_DEBUG: this takes a numeric value which controls the type of debugging output to generate. If you set it to -1 then Kpathsea will log everything into the file pointed to by KPATHSEA_DEBUG_OUTPUT. However, note that setting KPATHSEA_DEBUG=-1 will create a lot of output. Other values for KPATHSEA_DEBUG are documented here.
OK, I think that’s enough for one post. I’ll (hopefully) complete this series in the next tutorial. Until then, stay tuned and let me know if you spot errors in the above. I’ll fix a few tiredness-induced typos in this post, too! (update: ahem, few typos fixed… was rather late to be writing this…)
[…] to understand/appreciate is the difference between characters and glyphs. I've discussed this in a previous post but will summarise here (quoting from the Unicode […]